A lot of people that watched my DIY Backyard Sauna Sauna Series on YouTube asked me if they could purchase the plans. So I put two sets together that cover everything you need to make the exact same Sauna. Here they are:
6′×8′ Outdoor Sauna — Framing Plans
These are the plans I drew from building a 6′×8′ cedar sauna on my back deck. Every dimension, every cut, pulled from the as-built measurements, not generic templates.
Floor framing plan — sleeper layout @ 10″ O.C., cedar deck direction, with substitution notes for non-deck build
Back wall elevation — 96″×88″, with a California-corner detail (single corner stud + backing block) for less thermal bridging and more insulation cavity
Front wall elevation — door & window rough openings precisely dimensioned, with kings/jacks/headers/cripples all called out
Side wall elevation — slope-cut studs with exact cut lengths at every position (88″ back tapering to 79″ front)
Roof framing plan — rafters @ 16″ O.C. on edge + outer 2×4 wrap for the eave overhang
Materials & cut list — every 2×4, every fastener, with real prices from my build
You can watch how I framed this sauna using these plans step by step in this video here.
6′×8′ Outdoor Sauna Interior & Finish Plans
Phase 2 of the build, picking up where the framing leaves off. These are the actual interior decisions from my own sauna: wall buildup, bench geometry, heater placement, vent positions, all drawn from the as-built measurements.
Interior plan view — bench positions, heater corner, vent placement, door swing
Back wall interior elevation — 17 cedar boards + top exhaust vent dimensioned
Front wall interior elevation — door + window mirrored from exterior, intake vent at heater wall
Side wall interior elevation — 16 + 1 angled cedar board, heater placement with clearances, thermometer position, electrical note
Bench detail — cross-section + plan: top bench (8’×20″×44″H) + bottom bench (8’×15″×26″H) offset forward, joists 12″ O.C., 4″ cedar slats with 1″ gaps
Materials & cut list — cedar counts per wall, insulation, vapor barrier, furring, vents, heater, bench lumber
You can also buy both PDFs together: 15 pages of dimensioned drawings, materials lists, and build-tested decisions for a 6′×8′ outdoor cedar sauna. Framing through finish, drawn from an actual build on a backyard deck. Prices for lumber and hardware documented with real prices from my exact build.
The final post in my DIY backyard sauna build series. If you missed earlier parts: Part 1 (site prep & framing), Part 2 (roof & weatherproofing), Part 3 (siding, window, ventilation), Part 4 (lighting, vapor barrier, cedar)
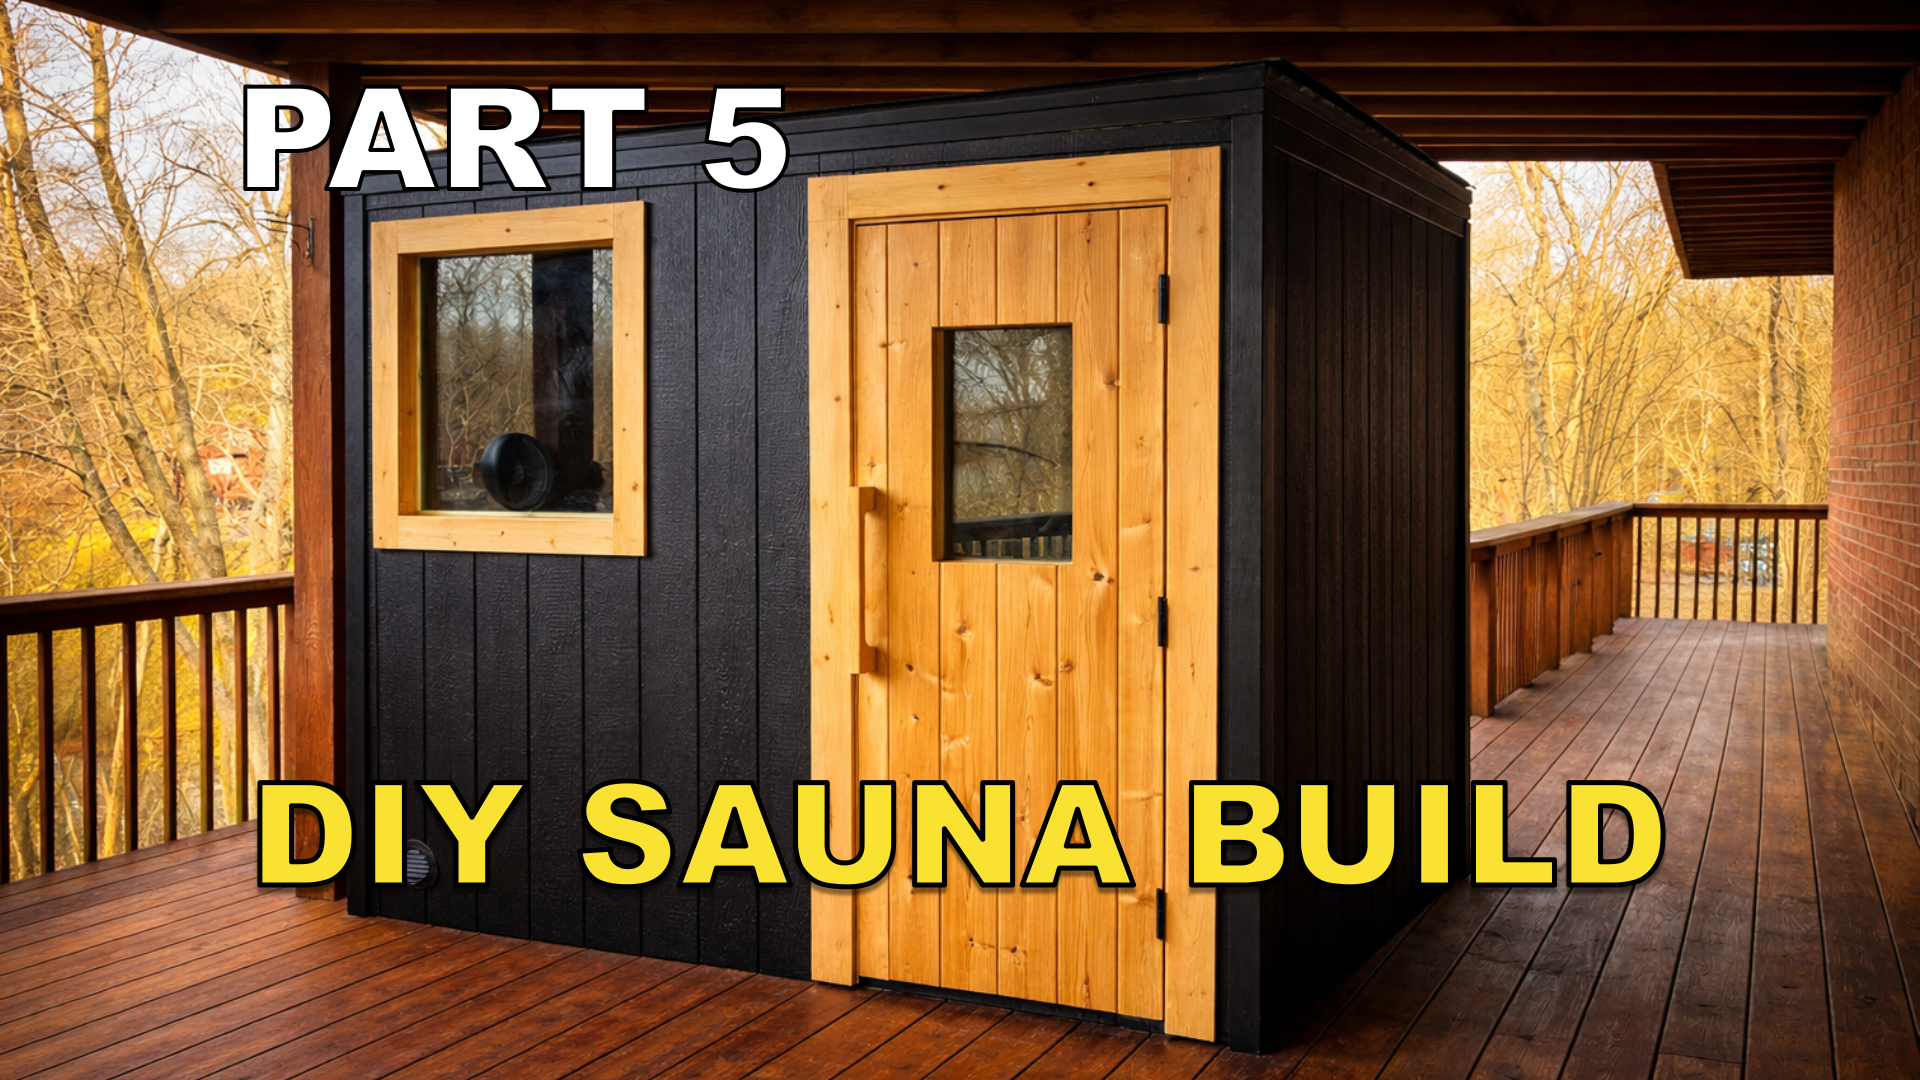
This is the one. The finale. Months of weekends compressed into a single episode that takes the sauna from “almost there” to “finished, fired up, and family-tested.”
It’s also the longest video in the series, because the last 20% of any build is somehow always the most work. Custom door, benches, exterior ventilation finished out, electrical run, heater installed, first sauna, and a full tour.
Here’s how it came together.
Exterior Ventilation Finished Out
I’d already framed the ventilation openings earlier in the build, but this stage was finishing them out adjustable exhaust vent cover and the intake vent. The intake sits low below the heater and adjacent to it; the exhaust sits high on the opposite wall. That layout creates a slow convection loop that keeps fresh air moving through the room without dumping heat out.
If your sauna gets stuffy, your ventilation isn’t right. Mine breathes well I can feel a gentle pull of air when the heater’s running, and when I pour water on the rocks the steam doesn’t linger, but moves over me and dissipates.
Building the Custom Door from Scratch
I saw people say this in other videos, and it’s true: building a door from scratch is not that easy.
I started by carefully measuring the doorway on all four sides, then constructed and sanded the frame before squaring it up, gluing the corners, and test-fitting it in the rough opening to make sure it would swing cleanly without rubbing. Getting a door to sit flush is a fussy process: a sixteenth of an inch in the wrong direction and it won’t close right.
Then I laid one side of the door with the same tongue and groove cedar that’s installed on the interior of the sauna, before flipping it and filling it with R15 Rockwool insulation. We don’t want any part of the sauna to be a weak spot for heat loss, so it’s important that the door has the same quality of insulation as the rest of the walls.
After that I installed my second piece of custom tempered glass that I ordered from a local glass shop, then all I needed was a handle.
The door took longer than any other single piece of this build, but it was worth it: a flimsy door would have undone everything else.
Finishing the Remaining Cedar
With the door in, I wrapped up the last of the interior cedar corners, the doorframe, and the trickier cuts around fixtures and ventilation. The hand-fitting for these last pieces takes more time than the long, easy runs do. Patience here pays off in how the finished room reads visually.
Designing and Building the Benches
Benches are where a lot of DIY saunas go sideways. Wrong height, wrong depth, wrong wood, and the room becomes uncomfortable to sit in.
A few principles I followed:
Two tiers, with the top bench tall enough that your feet are well above floor level when seated. Heat rises, and the top bench is where you actually want to sit.
Bench depth wide enough to lie down comfortably. A bench you can only sit on is a bench you’ll only use for ten minutes at a time.
Soft cedar (Western Red or Aspen-style), not regular construction cedar. The wood touches your skin. It needs to be smooth and low-resin so it doesn’t get sticky or sappy at temperature.
Top bench went in first, then the bottom bench. Testing by sitting in the unheated room felt good.
Under-Bench Lighting
This was the small touch that ended up making the biggest aesthetic difference. LED strip lighting tucked under the front edge of the top and bottom bench, washing soft light down toward the floor.
It does two things: practical (you can see where you’re stepping in a dim room) and atmospheric (it’s the difference between a wood box and a space you actually want to spend time in). It also lights the space, and not the people, which is an important element.
Running the Electrical
I covered the wiring approach in earlier episodes 50 amp circuit from the main panel to an outdoor 50 amp disconnect, 6/3 wet-rated wire to the sauna control panel, then to the heater. This stage was finishing those connections, mounting the control panel, and wiring up the heater itself.
If you’re not comfortable with this part of a build, hire it out. The electrical is the one place where “I’ll figure it out as I go” is genuinely dangerous.
Heater Test and First Sauna
Powered the heater up for the first time. Watched it climb. Threw water on the rocks for the first time and felt that wave of löyly hit the room.
It worked.
There’s a specific quality to the heat in a properly insulated, properly vented sauna with the right kind of stove that you don’t get in a prefab unit or a cheap kit. It’s softer, more even, and the steam has weight to it. That feeling is what I was chasing through this whole build, and it was there on the first burn.
Heating Theory in Practice
Sauna heat works on three fronts:
Convection — hot air rising and circulating through the room.
Radiation — direct radiant heat from the heater and stones.
Steam (löyly) — water on hot rocks creating a brief, intense spike of humidity and perceived heat.
A good sauna balances all three. Too much convection without radiation and steam, and you get a hot room that feels flat. Too much radiation, and you get scorched skin without the depth. Steam ties it all together.
Painting and Final Trim
A few exterior touches: paint where it needed paint, cedar trim to clean up the visible transitions. The kind of small finishing work that’s invisible if you do it right and impossible to ignore if you don’t.
The First Family Sauna
The whole point of this project was to have something the family could use together. The first sauna with everyone in it was the moment that made the months of weekends worth it.
The room felt right. The light was warm. The kids loved it. We talked.
This is what I built it for.
Final Thoughts on the Heater
After several weeks of regular use, a few notes on the heater I went with the Vevor 9kW 200V electric heater which is an absolute steal on Amazon at $200. Worth its own paragraph since the heater is one of the decisions DIY builders agonize over the most:
Trumpkin and most other sources go back and forth on this, and the recurring theme is that heater quality matters a lot. They’ll typically point you toward Harvia or one of the other premium brands that run anywhere from about $1,000 up to $3,000 depending on size and features. My take is that once you’ve gone electric, you’ve already stepped away from the traditional wood-fired stove, and at the end of the day the thing is really just heating a pile of rocks. For my room I probably could’ve gotten away with a 6–8 kW unit, but I oversized to 9 kW and the whole space comes up to temp in about 20 minutes — maybe 30 if it’s really cold out. And even if a component does eventually fail, I could replace this heater ten times over before I’d hit the price of a single premium one. Three or four months in, no issues, no regrets. At 9 kW for what it costs, it’s a great buy.
Sauna and Cold Plunge
I didn’t cover the cold plunge in this build, but I’ve been pairing the sauna with a cold plunge after each session. The contrast is the point. Hot, then cold, then rest. Several rounds. The energy and clarity afterward is its own kind of medicine, and it’s something I wanted built into the daily rhythm of where we live.
What This Build Taught Me
A few things I keep coming back to:
Custom always takes longer than you expect. Especially the door. Especially the door.
Don’t cheap out on the parts that matter. Vapor barrier, high-temp silicone, tempered glass, the heater. These are the things that decide whether the sauna lasts 5 years or 30.
Ventilation and insulation are 80% of whether a sauna works. Pretty cedar on the inside doesn’t matter if the wall cavity rots out behind it.
A good resource is worth its weight in gold.Trumpkin’s Notes saved me from probably ten major mistakes.
Thank You
If you’ve followed this series from the start — thank you. Sharing this build was one of the most rewarding parts of the project, and the questions and feedback in the comments made me think harder about a lot of the decisions.
If you’re starting your own build: take your time, do the boring steps right, and don’t underestimate the door.
Part 4 of my DIY backyard sauna build. If you’re just joining: Part 1 (site prep & framing), Part 2 (roof & weatherproofing), Part 3 (siding, window, ventilation).
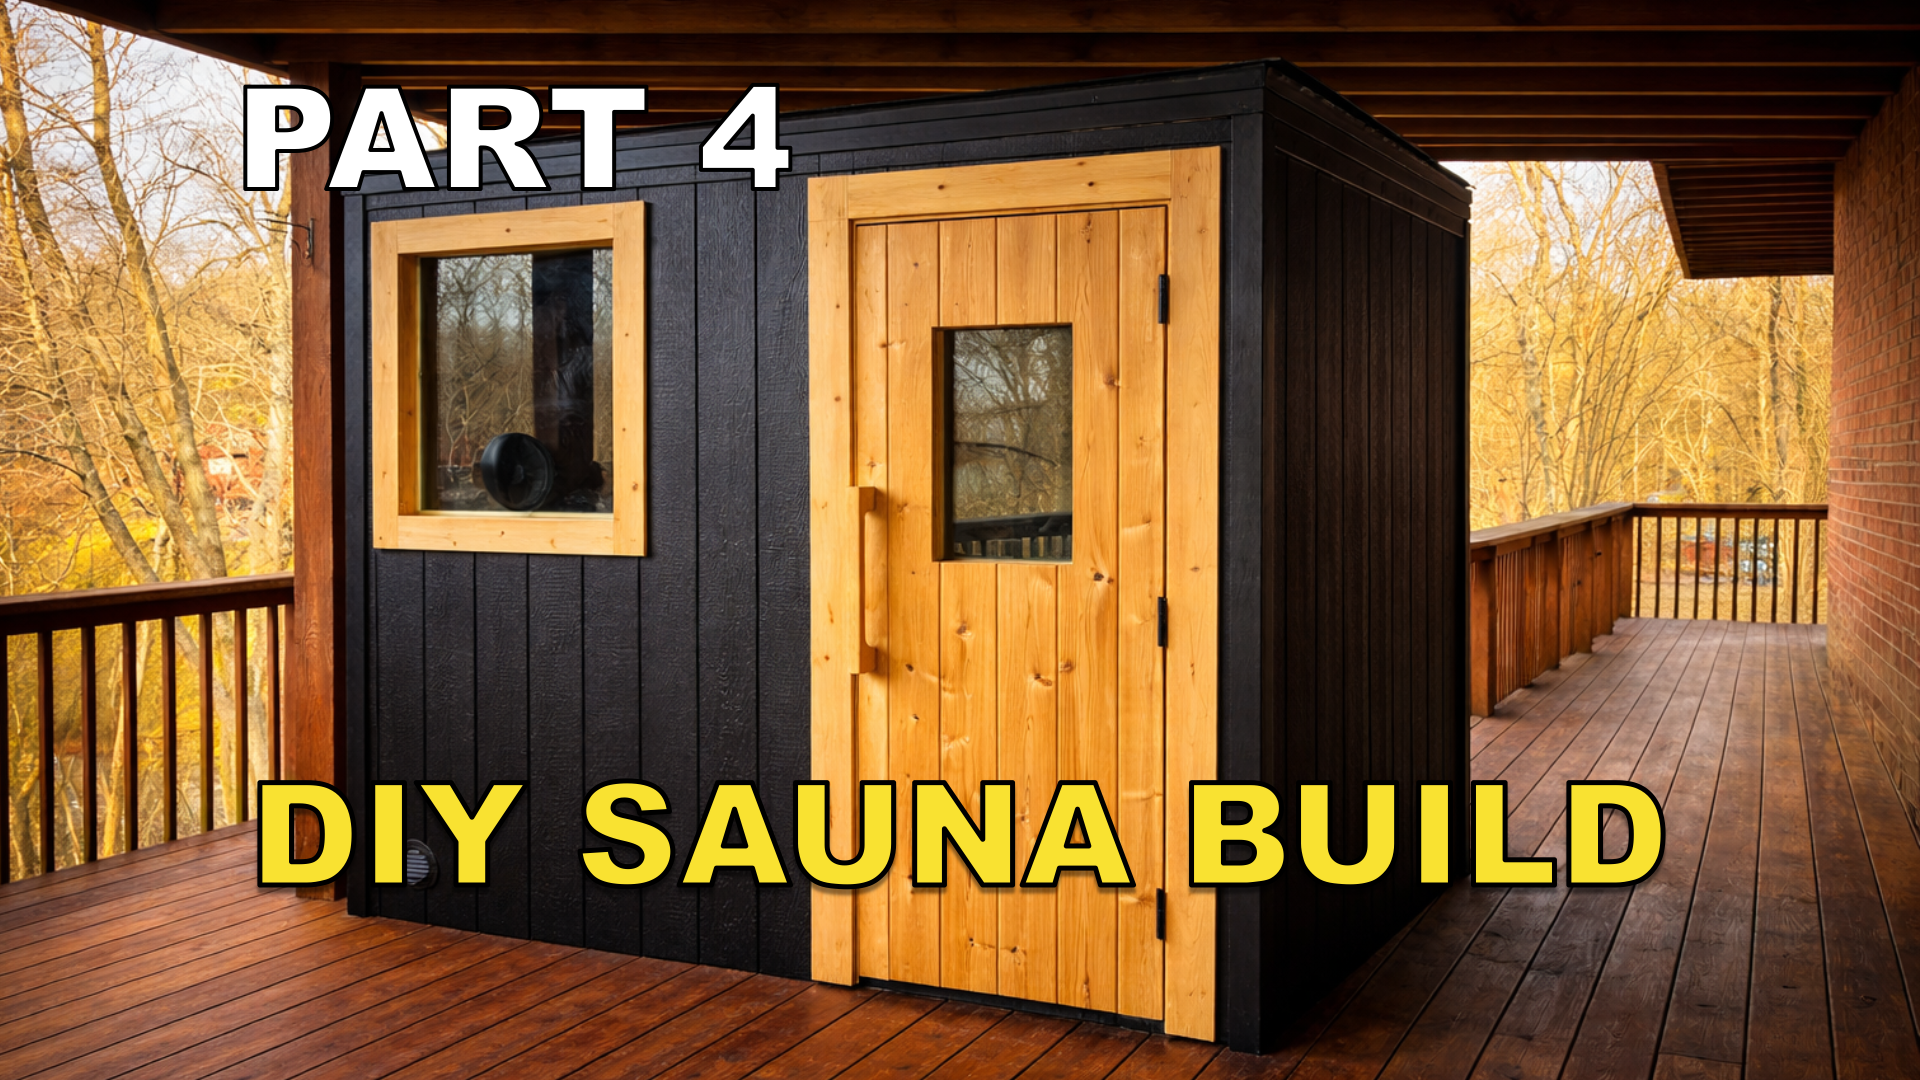
This is the episode where the inside of the sauna stops looking like a construction site and starts looking like a sauna. The sequence — lighting wiring, vapor barrier, furring strips, cedar. This has to happen in this order, because once the cedar goes up, anything you forgot is staying forgotten.
It’s also one of the shorter episodes in the series, but the steps in it matter a lot for whether your sauna lasts 30 years or starts rotting from the inside out in 5.
Running the Lighting Electrical
Sauna lighting has to handle high temperatures and high humidity, which rules out a lot of standard fixtures. I went with a setup designed for sauna use, ran the wiring through the wall cavities before any insulation or vapor barrier went on, and left a little slack at each fixture location so I had room to work later.
A few things I’d flag for anyone doing this themselves:
Run the wire before the vapor barrier. Once the vapor barrier is up, you don’t want to be poking holes in it.
Use temperature-rated wire. Standard wire jacketing can degrade in sauna conditions. Check the rating on whatever you’re running.
Plan your switch location outside the hot room. You don’t want a standard switch on the inside of a sauna.
Ran a quick test once it was wired in to make sure everything worked before sealing it all up behind the wall.
Vapor Barrier
This is the part most non-sauna DIY guides skip or get wrong, and it’s arguably the most important step in the whole interior build.
A sauna gets hot and humid in cycles: heat up, cool down, repeat. That moisture wants to migrate out through the walls. If it gets into the insulation and stays there, you get mold, rot, and a sauna that smells wrong forever.
The fix is a foil-faced vapor barrier on the warm side of the insulation (the inside of the sauna). The foil reflects radiant heat back into the room and blocks moisture from getting into the wall cavity. Tape every seam with foil tape, not regular duct tape, which will fail.
Two rules I followed:
Continuous coverage. Walls and ceiling, every cavity, every seam taped.
Seal around penetrations. Lighting wires, ventilation openings, anything that punctures the barrier needs to be sealed back up.
This step is boring and slow. Do it right anyway.
Installing the Furring Strips
Furring strips go up over the vapor barrier, running perpendicular to the direction the cedar will run. Do not skip furring strips. It does very important things:
Creates an air gap between the vapor barrier and the cedar paneling. This gap lets any incidental moisture dry out instead of sitting against the wood and also allows the cedar to dry on both sides.
Gives you something to nail the cedar to without puncturing the vapor barrier in random places.
My colleague Tyler who also built a sauna pointed out a third benefit I hadn’t fully understood. Without an air gap, the cedar is in direct contact with the framing, so the heat in the wood conducts straight through into the studs and gets pulled into the insulation. With the air gap, the cedar can’t dump its heat into the wall instead, it re-emits the heat as infrared radiation, which the foil-faced vapor barrier reflects back into the sauna. As a result: your cedar walls stay hot, but your insulation stays cool.
I used 1×2 furring strips over each stud, fastening them with 3 inch construction screws since they would hold the whole weight of the cedar.
Installing the Cedar
This is the satisfying part. Tongue and groove cedar going up, board by board.
A few things that helped:
Start with a level reference line. If your first board isn’t level, every board after it is fighting that mistake.
Hidden-nail through the tongue. No exposed fasteners on the face of the wood.
Acclimate the cedar. Let the wood sit in the build space for a few days before installing so it adjusts to ambient humidity. Cedar that’s installed too dry or too damp can move on you.
Stagger your seams. Same as flooring, staggered seams look way better than aligned seams.
The cedar smell hit immediately. That alone made all the tedious work of the vapor barrier feel worth it.
What’s Next
Part 5 is the finale: exterior ventilation finished out, custom door built and installed, benches designed and built, electrical finished, heater installed, and the first sauna. It’s the longest episode in the series and easily the most satisfying to film.
Part 3 of my DIY backyard sauna build. If you’re just joining, start with Part 1 (site prep and framing) and Part 2 (roof, sheathing, and weatherproofing)
With the structure framed, roofed, and wrapped, it was time to start turning the sauna from “box that looks like a shed” into something that actually functions as a sauna. Part 3 is where that shift starts — I got the exterior siding on, installed the custom glass window, worked through the ventilation system, and started prepping for the electrical.
Ventilation ended up being the piece I researched the most, and honestly it’s the part of a sauna build I see people mess up the most online. So I’ll spend some time on it here.
Cutting the Door Opening and Installing the Front Siding
Before siding went on, I had to cut the rough opening for the door through the sheathing and house wrap. Pretty straightforward — measure twice, cut once, and keep the cut as clean as possible because the trim will cover small mistakes but not big ones.
From there, the front siding went up. I worked off the top, keeping a consistent reveal between boards.
Ventilation Theory (The Part Most DIY Saunas Get Wrong)
A sauna isn’t just a hot box. For it to actually work — meaning the heat stays where bodies are, humidity moves correctly, and you don’t suffocate — you need air moving in a deliberate way.
The short version of what I landed on:
Intake goes low, near the heater, so fresh air gets pulled up through the stones and into the room at temperature.
Exhaust goes on the opposite wall, ideally placed to encourage a slow convection loop rather than dumping hot air out the top.
You want air turnover without killing the heat — maybe 4–6 air changes per hour depending on the source.
Like I mentioned in the videos, I based my setup largely on Trumpkin’s Notes on Building a Sauna, which is the most useful free resource I found on this topic. If you’re planning a build, read it before you frame anything.
Exterior Trim and Caulking
Trim went on after the siding — corners, around the window, around the door opening. Not complicated but the kind of detail work that either looks great or looks off, depending on how patient you are with it.
Then came caulking every seam that would see weather. Use an exterior-grade product rated for the temperature swings in your area. Cheap caulk cracks in a year or two and then you’re chasing leaks.
The Custom Glass Window
This was the moment I was most nervous about in the whole build. I had a custom tempered glass panel made at a local glass shop based on the rough opening dimensions I’d framed in Part 1. Tempered is non-negotiable here — regular glass near sauna temperatures is dangerous.
When it arrived, I dry-fit it first without any sealant just to make sure the opening was right. It was — barely. A snug fit on the right and left side and about a 2 inch gap on top that required additional framing to close that opening.
Then I framed the opening with cedar stops, applied a bead of high-temp silicone (the red stuff — rated for 500°F+), set the glass, and locked it in with the interior stops. High-temp silicone is the right call here. Standard silicone will off-gas or degrade at sauna temperatures.
Prepping for Electrical
With the exterior buttoned up, I started prepping for the electrical run. I’ll cover the actual wiring in Part 4, but at this stage it was mostly about locating the control panel, thinking through the conduit path, and making sure everything I’d need was on hand before I opened anything up.
What I’d Do Differently
A couple of lessons from this stage:
Dry-fit the glass panel the moment it arrives. If something’s off, you want to know before you’ve committed to sealants and trim.
Don’t skimp on high-temp silicone. It’s $10 more than the regular tube and it’s the difference between a window that lasts and one that fails in a year.
Plan your ventilation before you frame, not after. I got lucky that my placements worked out, but if I were doing it again I’d mark the exact intake and exhaust locations during framing.
What’s Next
Part 4 is a short video covering the lighting electrical, vapor barrier, and installing the furring and the first part of the actual interior cedar. Part 5 is finishing the sauna, and using it!
Part 2 of my DIY backyard sauna build is here! In this episode I get the sheathing up, build and install the roof, wrap the whole structure in Tyvek, install hurricane ties, insulation, and flash the window and door openings.
This was the stage where the sauna finally started to look like an actual building and where a few small mistakes (looking at you, drip edge) taught me some lessons I wish I’d learned before starting.
Part 1 is here with parts 3, 4, and 5 coming in the next few days.
I spent the last several months designing and building a sauna from scratch in my backyard and finally started posting the build on YouTube. Part 1 is live! It covers the background, site prep, and framing.
Key things covered:
– Why I decided to build instead of buy
– Site preparation
– Base frame construction
– Wall framing and layout
Part two is also already live with the rest coming in the following days.
I believed it then. I believe it now. But I’m starting to wonder if the rest of the internet got the memo, because things have gotten significantly worse.
I use Firefox. I’ve written about this before. I use it because it’s open source, because Mozilla isn’t Google, and because Google already has enough of my data without handing them my entire browsing history on top of it. I even wrote a Firefox extension to fix a hotkey change that Mozilla made in Firefox 88 that messed up my workflow. I’m committed to this browser. I don’t want to leave.
But the web is making it really, really hard to stay.
The Numbers Are Brutal
Let’s just look at where we are. According to StatCounter, Chrome’s global market share was 65.87% in 2022. By 2025, it climbed to 68.35%. On desktop specifically, it’s sitting at 73.26% as of February 2026. Firefox? It went from 3.04% in 2022 to 2.37% in 2025 to 2.29% now. That’s not a decline. That’s a slow death.
And here’s the thing that makes it even worse: Chrome isn’t the only browser running on Google’s engine. Edge, Brave, Opera, Vivaldi, Arc… they all run on Chromium. When you add them all up, roughly 70% of all browsers on the planet are running Google’s rendering engine. Firefox and its Gecko engine are basically the last ones standing that aren’t either Chromium or Apple’s WebKit.
We have been here before. This is IE6 all over again. Except this time the dominant browser is actually good, which makes the problem harder to see and even harder to fight.
Developers Don’t Test Anymore
Here’s where it gets personal. I browse the web every single day in Firefox and I run into broken websites constantly. Not “oh this font looks a little different” broken. I mean login forms that won’t submit. Payment flows that hang. Entire web apps that just show a blank white page. Dropdown menus that don’t open. Modals that trap your focus and never let go.
Mozilla’s own community forums are full of people reporting the same thing. Users on Mozilla Connect describe websites that load in seconds on Chrome but take over a minute in Firefox. E-commerce sites where the payment button literally does not work unless you switch browsers. I can’t even pay my internet bill in Firefox. I’m not kidding.
The MDN Browser Compatibility Report found that only 44% of developers were satisfied with the state of cross-browser compatibility. One developer in that survey said it plainly: “Chrome and Firefox are starting to diverge, with Chrome adding features before they’re fully standardized. As the dominant browser, some pages are being written to only work in Chrome now.”
Another one: “Many APIs are Chrome-only and will never show up in other browsers.”
This is not a Firefox problem. This is a developer problem. The browsers themselves are actually converging on standards. The Interop 2024 project ended the year with 95% of web platform tests passing across Chrome, Edge, Firefox, and Safari. Firefox scored the highest at 98.8%. Let me say that again: Firefox has the best standards compliance of any major browser, and websites still break in it because developers simply do not test.
Enter the Vibe Coders
So that’s the baseline. Developers were already building Chrome-only websites before AI entered the picture. Now let’s talk about what happened when you gave millions of people the ability to generate entire web applications without understanding what they’re generating.
The timeline is almost poetic. Anthropic released Claude to the public in July 2023. Claude 3 dropped in March 2024. ChatGPT had already been out since late 2022. By 2025, “vibe coding” had become an actual term. Andrej Karpathy coined it. The idea is simple: you describe what you want, the AI writes the code, you accept it and move on. You don’t really look at it. You just… vibe.
And during this exact same window, Chrome’s market share went up. Firefox’s went down.
Now, correlation isn’t causation. I’m not claiming AI killed Firefox. But I am saying that AI made an existing problem dramatically worse, and here’s why.
As I mentioned above, developers were already bad at cross-browser testing. They at least had the knowledge to do it if they wanted to. Vibe coders don’t even have that. They’re accepting generated code without reviewing it. Researchers have called this the “verification gap,” where building has been democratized but testing has not. A study from December 2025 found 69 vulnerabilities across 15 vibe-coded test applications. AI co-authored code showed 2.74x higher security vulnerabilities and 75% more misconfigurations than human-written code. If these tools can’t even get security right, you think they’re generating proper cross-browser fallbacks?
LLMs are trained on the internet, and the internet is overwhelmingly Chrome. When an AI generates CSS, it reaches for -webkit- prefixed properties because that’s what dominates the training data. When it generates JavaScript, it uses APIs that Chrome supports because those are the ones most represented in the corpus. It’s a feedback loop. Chrome dominates, so the training data skews Chrome, so the AI generates Chrome-first code, so more websites only work in Chrome, so Chrome dominates further.
Even some of the vibe coding platforms themselves are part of the problem. Bolt, one of the popular ones, straight up tells you it “works best on Chrome and other Chromium-based desktop browsers.” The tools used to build the web are now themselves Chrome-only. Let that sink in.
The IE6 Lesson Nobody Learned
In the early 2000s, Internet Explorer had somewhere around 95% market share. Developers built “works best in IE” websites. ActiveX controls everywhere (lol remember that?). Proprietary extensions that only worked in Microsoft’s browser. The web became a monoculture, innovation stalled, and it took years to dig out of that hole. Firefox was literally born to solve that problem.
We are doing the exact same thing again, except this time it’s Google instead of Microsoft, and this time we have AI accelerating the consolidation at a pace that makes the IE era look quaint.
Google reportedly makes up 60-70% of W3C meeting attendees. They are not just building the dominant browser. They are driving the standards process itself. The fox is running the henhouse, and the hens are writing Chrome-only websites with AI tools that don’t know any better.
I Might Have to Switch
I never thought I’d write this. I have used Firefox for a long time. I believe in what it represents. An open, independent web where no single company controls how you experience the internet. I’ve written more than one browser extension for it, I’ve reported bugs, I’ve defended it in conversations more times than I can count.
But I’m tired of being the person who has to keep a second browser around for when things don’t work. I’m tired of hitting a login page and wondering if the button is broken or if it’s just Firefox. I’m tired of doing a double-take every time a website looks weird, trying to figure out if it’s a bug or if the developer just never opened anything except Chrome.
At some point, principle runs into practicality. And right now, using Firefox on the modern web feels like bringing a perfectly good car to a highway that was paved exclusively for trucks.
What’s Actually at Stake
If Firefox dies, and its market share trajectory suggests that’s not a hypothetical, we lose the last truly independent browser engine. Every browser will either be Chromium or WebKit. Google will effectively control how the web renders for everyone on the planet.
A single Chromium vulnerability would affect the vast majority of browser users globally. A single change to how Chromium handles ads, tracking, or content would ripple across billions of screens. One company. One engine. One point of failure.
The U.S. Department of Justice proposed in November 2024 that Google divest Chrome entirely. They valued it at around $20 billion. Whether that happens or not, the fact that it’s even being discussed should tell you something about how consolidated things have gotten.
I don’t have a clean solution here. I can’t make developers test in Firefox. I can’t make AI tools generate cross-browser code. I can’t single-handedly prop up a browser engine’s market share.
But I can say this: if you’re a developer, open Firefox. Load your site. Click around. Fill out a form. Try to pay for something. If it doesn’t work, fix it. It’s that simple.
And if you’re building websites with AI and you’re not testing the output in multiple browsers, you’re not building websites. You’re building Chrome extensions with extra steps.
If your website only works in Chrome, it doesn’t work.
IRC, Slack, Discord, P2s, Adium jabber alerts, ntfy.sh pings, Telegram, WhatsApp, iMessage. I have thousands of streams of text coming at me every single day. It’s just ping ping ding ding ding from the moment I open my laptop until I close it.
And somewhere in that noise, my wife texts me that the kids have a baseball game Tuesday at 5pm at Riverside Park.
She’s incredibly organized. She texts me about dates, plans, appointments, school events, family stuff. All the time. And she’s great about it. The problem is me. I’m neck deep in a Kubernetes migration or chasing a kernel bug, and by the time I come up for air, that text is buried under 47 Slack threads and a Discord ping about someone’s homelab.
So I built something to fix it.
iMessageWatcher
iMessageWatcher is a macOS menu bar app that watches my iMessages specifically from my wife and uses a local LLM to figure out if a message contains an event, a date, a reminder, or something I need to act on. If it does, the app automatically creates a calendar event with the name, location, time, and all that. No input from me. No copy-pasting. No “I’ll add that later” (which means never).
The whole thing runs locally. The LLM runs on my machine through Ollama. My wife’s messages never leave my device, never hit a cloud API, never get sent to OpenAI or anyone else. That was non-negotiable for me.
How It Works
The app sits in your menu bar and polls the iMessage database (~/Library/Messages/chat.db) every 60 seconds. It watches for new messages from whichever contact you configure (in my case, my wife’s number).
When it finds new messages, it grabs the recent conversation context and sends it to a local Ollama instance running deepseek-r1 (or whatever model you prefer). The LLM gets a prompt that basically says: “Look at this conversation. Is there an event, appointment, or task mentioned? If so, extract the name, date, time, and location. Return JSON.”
The app parses the response and creates the event in Apple Calendar. Done. My wife texts “Don’t forget about the kids’ baseball game Tuesday at 5pm, it’s at Riverside Park” and a few seconds later, “Kids’ Baseball Game” shows up on my calendar for Tuesday at 5:00 PM at Riverside Park. I don’t touch anything.
It also works with Apple Reminders, the Due app (a personal favorite reminder app), and ntfy.sh for push notifications. You can toggle each one on or off depending on your setup.
The Entire App Is 4 Files!!!1
This is probably my favorite part. The whole thing is 4 files with no Xcode project and no external dependencies:
main.swift : App entry point. 5 lines.
AppDelegate.swift : All the logic. Menu bar, SQLite scanning, LLM classification, EventKit integration, preferences window. Everything.
Info.plist : Bundle metadata and permission descriptions.
build.sh : Compiles the app, generates the icon programmatically, bundles everything into a proper .app.
No CocoaPods. No Swift Package Manager. No Xcode project file. You clone the repo, run ./build.sh, and you have a working macOS app. The build script even generates the app icon using Core Graphics in an inline Swift script. I love that kind of simplicity.
The compilation is just a single swiftc call:
swiftc -O main.swift AppDelegate.swift \
-framework Cocoa \
-framework EventKit \
-lsqlite3
That’s it. Two Swift files, three frameworks, one binary.
Why Local LLM
I thought about this a lot. I could have used OpenAI’s API or Claude’s API and gotten better classification accuracy out of the box. But these are my wife’s text messages. They contain personal details about my kids, our schedules, where we’ll be and when. I’m not sending that to a third party.
Ollama makes this easy. You install it, pull a model, and you have a local inference server running on localhost. The app just makes HTTP requests to http://localhost:11434. Everything stays on my machine.
The classification accuracy with deepseek-r1 is honestly great for this use case. It’s not trying to write poetry. It’s looking at a text message and deciding “is this an event or not” and pulling out structured data. Local models handle that just fine.
The SQLite Trick
iMessage on macOS stores everything in a SQLite database at ~/Library/Messages/chat.db. The app reads it directly using the SQLite3 C API (no ORMs, no wrappers, just raw queries). It tracks which messages it’s already processed using ROWIDs so it never creates duplicate events.
You do need Full Disk Access enabled for the app since chat.db is in a protected directory. The app checks for this on launch and walks you through enabling it if needed.
What It Actually Catches
Here’s the kind of stuff that used to slip through the cracks and doesn’t anymore:
“Soccer practice moved to Thursday at 4:30”
“Dentist appointment for the kids next Wednesday at 2”
“My mom is coming over Saturday around noon”
“Can you take and pick up the kids from school tomorrow?”
“I’m traveling for a work event the second week of April to Houston” (Yes it will do a multi day entry accurately”
“Don’t forget we have that dinner thing Friday at 7, it’s at that Italian place downtown”
The LLM is good at parsing casual language. My wife doesn’t text in calendar-event format. She texts like a normal person. And the model handles it.
It’s free, it’s open source, and your data never leaves your machine. If you’re someone who drowns in notifications and occasionally misses the important stuff from the people who matter most, this might help.
It definitely helped me stop being the guy who forgets about Tuesday at 5pm.
We’ve been running a large-scale Kubernetes cluster on Scientific Linux 7 for years. It works. It’s stable. Nobody complains. So naturally, we decided to migrate everything to Debian 12.
I’m leading this migration at Automattic, and it involves moving over a thousand servers to a completely new OS stack. New kernel, new cgroup version, new assumptions about how your containers actually use resources. The goal is straightforward: modern infrastructure, better tooling, fewer surprises down the road.
The surprises showed up immediately.
The Problem Nobody Warns You About
cgroups are the Linux kernel feature that controls and limits how much CPU, memory, and other resources a process can use.
Here’s the thing about cgroup v1 (the old way): CPU limits are soft. If your container says it needs 2 CPUs but the host has 16 CPUs sitting idle, the kernel lets your container burst way past its limit. Everyone’s happy. Your monitoring looks clean. Your apps run fine.
cgroup v2 (the new way) doesn’t do that. CPU limits are hard. You asked for 2 CPUs? You get 2 CPUs. Doesn’t matter if the host is 80% idle. The CFS quota enforcer will throttle your container the moment it tries to exceed its allocation.
This distinction matters a lot more than it sounds like.
0.32% to 42.6%
We had an nginx ingress controller handling external traffic for hundreds of millions of requests. The config was simple: 4 nginx workers, 2 CPU limit. On Scientific Linux 7, the throttle rate was 0.32%. Basically nothing. Health checks passed. Latency was fine. Life was good.
On Debian 12 with cgroup v2, the same config produced a 42.6% throttle rate. The host CPU was 76.9% idle. Plenty of headroom. But the container couldn’t touch it.
Here’s what happened in sequence:
4 nginx workers competing for 2 CPUs worth of quota
Workers hit the CFS bandwidth limit and get throttled
Throttled workers can’t call accept() fast enough
TCP listen backlog (default 511) overflows
Kernel starts dropping SYN packets
Health checks time out
Pod restarts
Same code. Same config. Same hardware. Completely different behavior.
It Wasn’t Just Nginx
Once we started looking, the pattern was everywhere. Workloads that had been “fine” for years were suddenly gasping for air:
A core platform service: 99% throttled
A search task manager: 100% throttled in prod, 99% in dev
A log pruning job: 100% throttled
Stream processing workers: 97-100% at their memory limits
Various sidecars (auth proxies, metrics exporters): 95-100% memory utilization
None of these had ever raised an alert on Scientific Linux 7. They were all quietly bursting past their stated limits, and nobody knew because nobody had a reason to look.
The Fix
The fix itself is boring. Bump the CPU limit to match the actual workload. For the nginx ingress, we went from 2 to 8 CPUs (2 per worker). Throttle rate dropped to 0.4%. Health checks passed. Done.
The interesting part is the discovery process. You can’t just do a blanket “double all the limits” because some workloads genuinely don’t need more. You have to look at each one, understand what it’s actually doing, and set appropriate limits based on real usage instead of inherited guesses from three years ago.
We ended up writing a tracker script that generates tab-separated output we could paste into a spreadsheet. For each workload: current CPU request, current limit, actual throttle rate, memory utilization. Sort by throttle rate descending. Start at the top and work your way down.
The Lesson
If you’re planning a migration from an older Linux distribution to something running cgroup v2 (which is basically everything modern at this point: Debian 12+, Ubuntu 22.04+, Fedora, RHEL 9), here’s what I’d tell you:
Audit your resource limits before you migrate, not after. Every container that’s been happily bursting on cgroup v1 is going to get a rude awakening on v2. The workload hasn’t changed. The enforcement has.
Run something like this on your current cluster:
# Check container CPU throttle rates
kubectl top pods --containers -A | sort -k4 -rn | head -20
Anything above 10-15% is a candidate for a limit bump. Anything above 50% is going to have a bad time on cgroup v2.
The Bigger Picture
This was just one of the problems we hit during the migration. There were kernel regressions that spawned 8,000+ kworkers and pegged a node at load 8,235 for 46 minutes. There were firewall rule asymmetries that broke cross-node metrics scraping. There were StatefulSet race conditions where Kubernetes would grab the wrong persistent volume if you weren’t fast enough.
Each one of those is its own story. But the cgroup v2 throttling issue is the one I think most people will run into first, and it’s the easiest to miss because everything looks fine until it suddenly doesn’t.
The migration is still ongoing. Over a thousand servers, hundreds of stateful workloads, and a lot of tar pipes between machines that can’t SSH to each other. I’ll write more about it as we go.
If you’re doing something similar, I’d love to hear about it. Hit me up on Twitter/X or LinkedIn.
I still think that critique was fair. But I’ve started using Claude Code for the past few weeks after all the opus 4.5 hype, and I need to update my assessment: Claude is actually pretty good.
I used it to re-write crapslesscraps.com from scratch, and I am very pleased with the results. Here is the before & after:
Before
After
In addition to looking way better, I went from this insanely complex project for something so simple: