Category: Portfolio

  • Automatic Fish Feeder

    Automatic Fish Feeder

    We’ve been “watching” my mother-in-law’s fish for the better part of two years. One of my least favorite tasks in the day is feeding the fish in the morning. There are a lot of morning tasks where putting my fingers near my mouth is a factor (brushing teeth, drinking coffee, etc.) and having to put nasty fish flakes on my hand is disruptive to those tasks.

    I decided to solve this with an Arduino and some stuff laying around the house. The project goal was to make a feeder that would feed the fish every 24 hours so I wouldn’t have to. I thought the hardest part would be the timer (spoiler alert: it was) but in actuality, engineering components that were never meant to feed fish was the really difficult and fun part.

    Inventory

    I bought and ELEGOO circuit board for the microcontroller, some random servos for the motorized mechanism, and a general electronics kit for wires and stuff. Don’t worry, those aren’t affiliate links playa… god forbid I get 20 extra cents.

    I started off by testing the board and some components. So far, so good.

    With that out of the way, I started working on getting the servo moving:

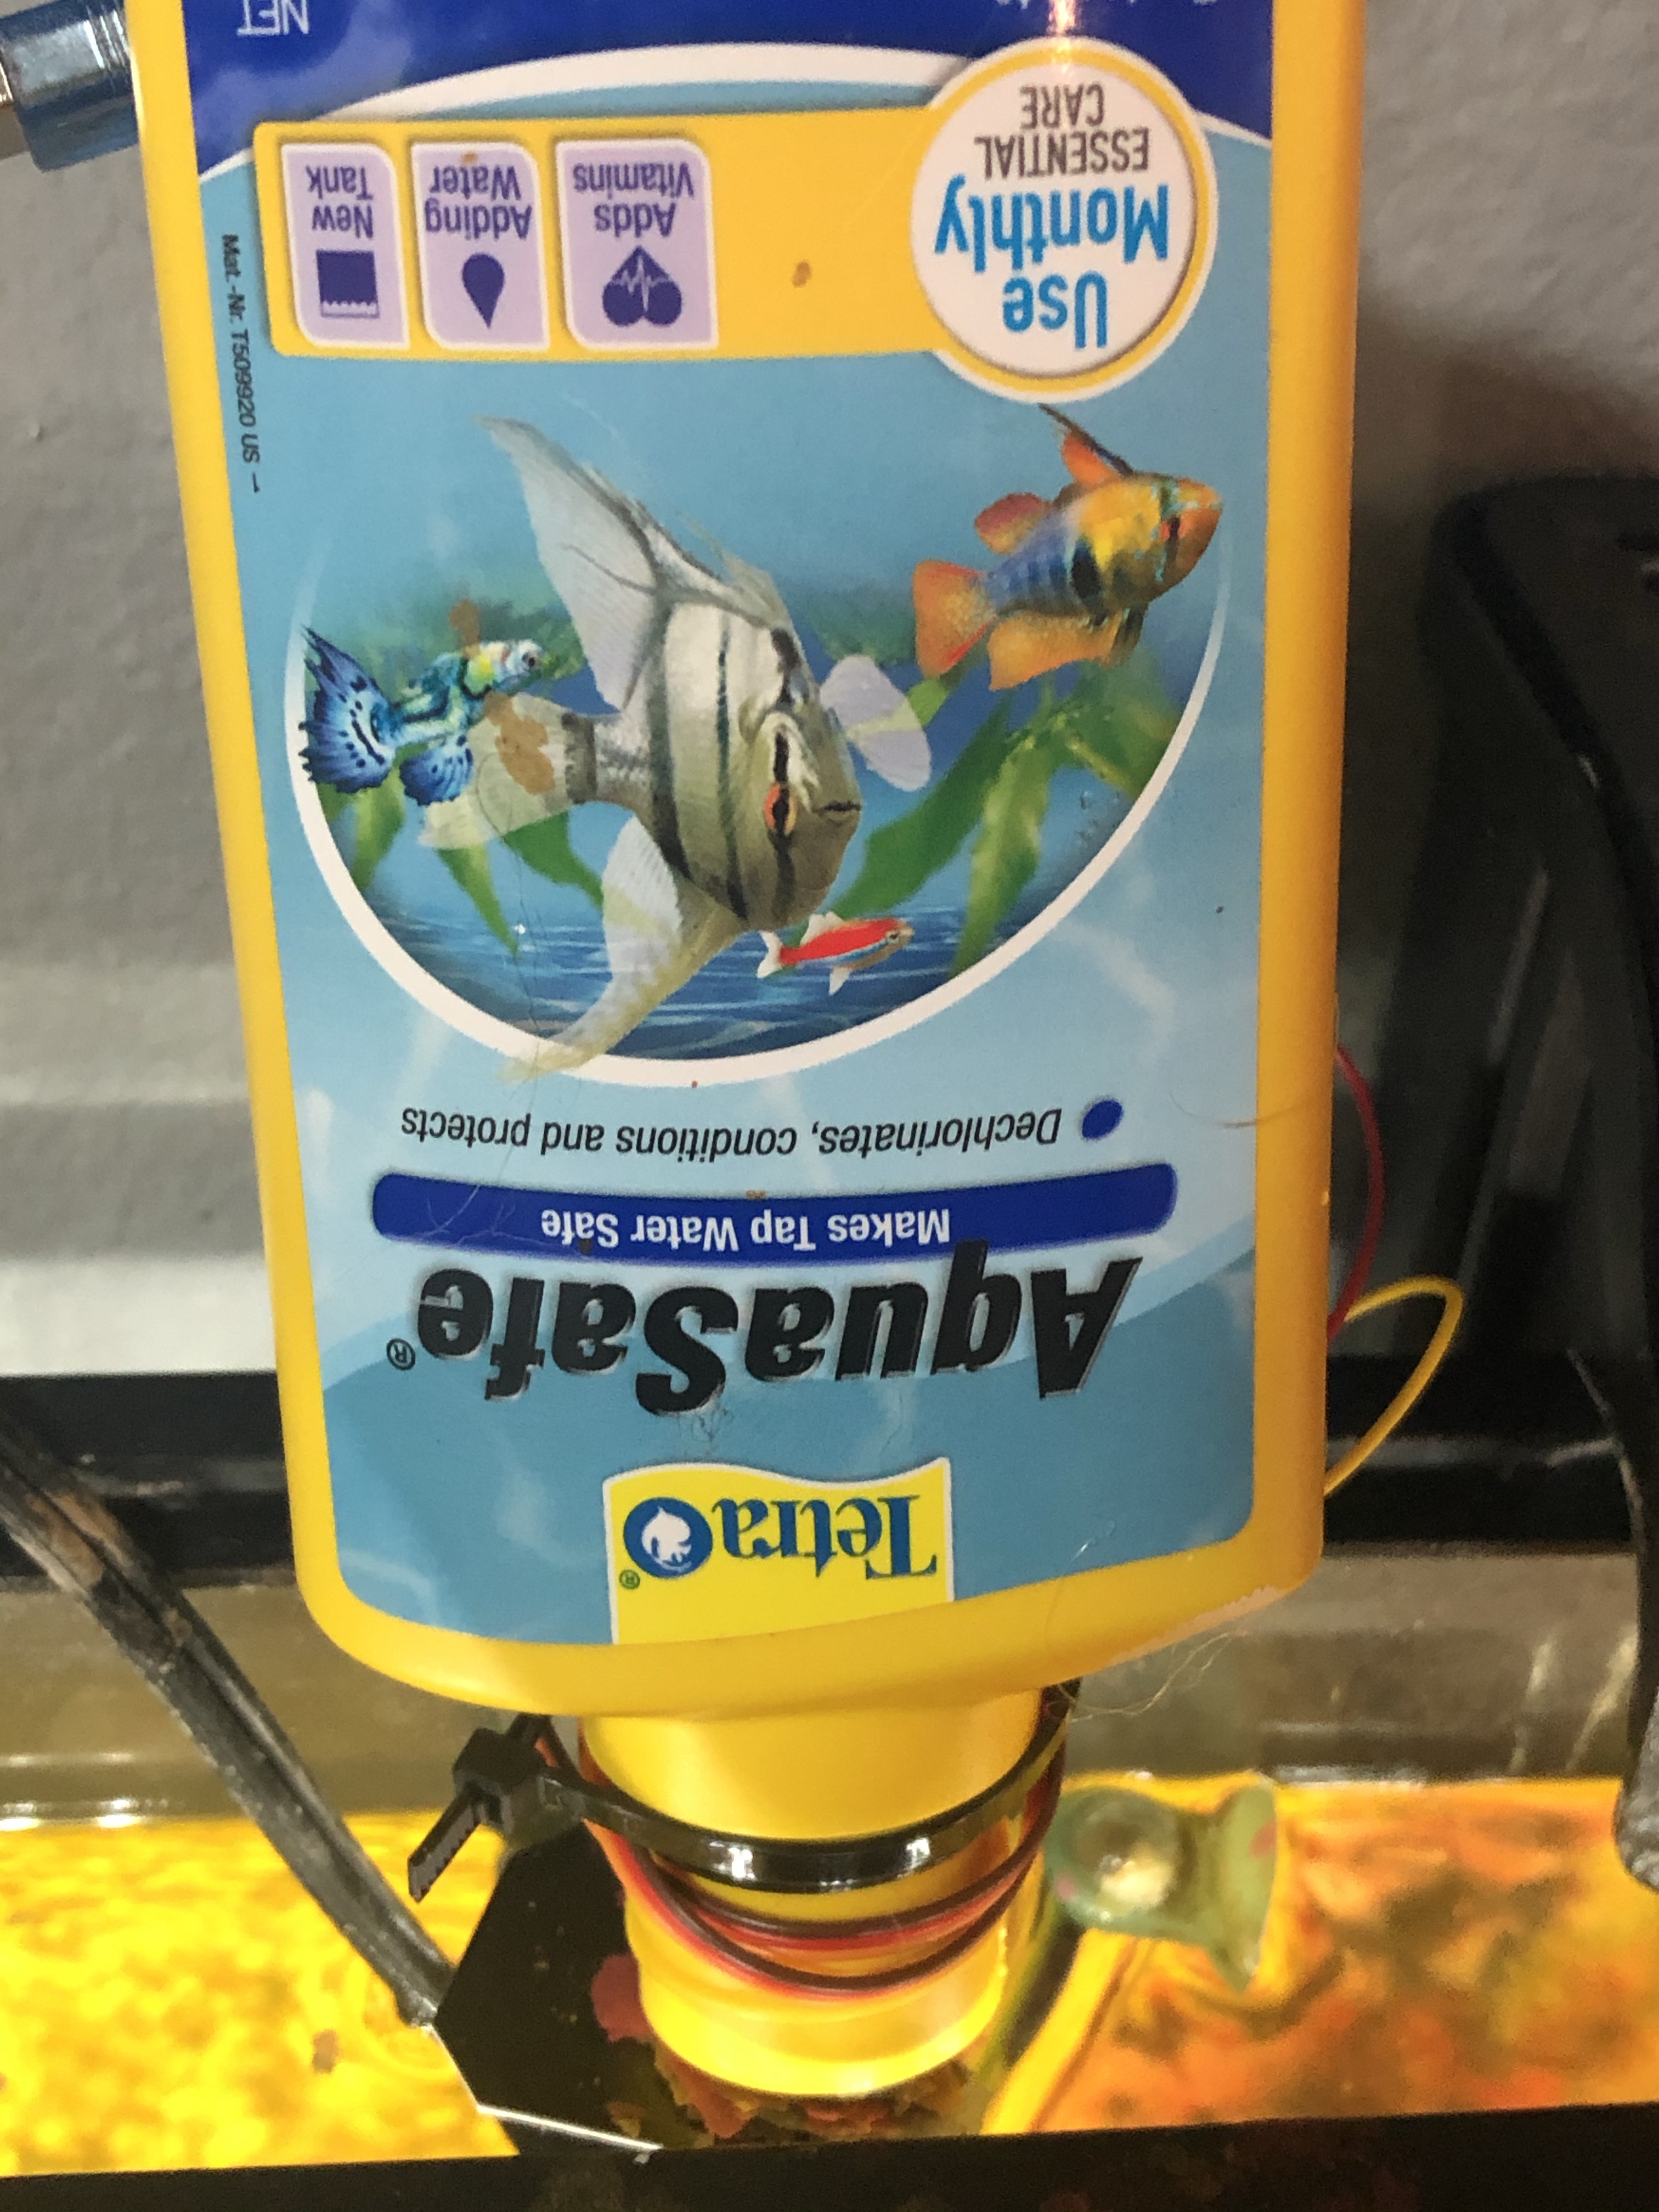
    After realizing the electronics portion of the project was coming together quite easily, I realized I had to start thinking about the physical container the food would reside in, and how I’d deliver it. I had a bottle laying around that I cut the bottom out of for the food to reside in.

    Now I had to think about how I would control the food from storage to delivery. For this, I decided to cut square of cardboard (from a JB Weld package of course) and attach it to the servo. Then, it was a quick ziptie to affix the servo-JBweld-stopper to the food storage container.

    Then I just had to get that bad boy moving:

    Working but…. I’ll kill my fish if they get that much.

    We had a working JBweld-cardboard-servo control, but it was going to need adjustment. I decided it would be a good idea at this point to start testing not only the angle to set the servo, but the frequency, friction, and amount of times to move the thing for the proper amount of food to fall.

    It was in testing that I discovered some physical bugs. Some people might have used a different material to simulate how the fish food would fall. Not me, I went and grabbed the flakes that were going to be used in a real-life simulation train like you fight was about all I learned in the Navy.

    I’m glad I did, because those stupid flakes didn’t want to come out of my bottle after the first couple of times, they’d get stuck in the larger canister but wouldn’t fall out of the mouth. Not good. I thought about some possible solutions. Solution #1 was to hot glue a pizza flyer into a cone and stick it in there:

    This was better but still not ideal. I needed something to disrupt the flakes and get them to fall. Ultimately I decided to hot glue a 3″ screw upside down against the JBweld-servo at the bottom so it would disrupt the entire food storage unit as it went back and forth.

    Bingo

    With that problem solved, I was able to tweak the code until I got the appropriate amount of food to fall on each run. Once satisfied with that, all that was really left was to put all the hardware together. Well I mean, there was that little “how will I power this thing” obstacle:

    imagine knowing this little about electricity

    Obviously that wasn’t going to work (lol) and servos require a bit more of a power draw than an LED. I remembered when I bought my house a few years ago the mortgage company gave me some small USB power banks. Perfect.

    Thanks OnQ!

    Now I could attach everything to a single contained unit! I used a plastic container that some screws came in, threw everything in there and zip tied it closed – now this is engineering!

    “it looks like an IED” -my wife

    With all that done, all that was left to do was send the device on its maiden voyage:

    my wife’s surprise at this device actually working says it all

    And that’s it! Here’s the final display:

    The profile actually doesn’t look that bad, and it’s self contained.

    Remember we talked about the timer? The timer situation isn’t ideal. I ran through some other options but for now I’m just going to run a delay() method for 24 hours. It’ll be off more and more every day because the processor can’t keep time like that, but I’m hoping it will run a week or so before it’s off by more than an hour. The other concern here is I have no idea what the total potential energy of the OnQ financial swag charger is or how long it will power the device for….. I guess we’ll figure it out.

    If you have any ideas or experience with this sort of thing, I’d be interested in hearing about what a more efficient way to power and run the timer might be. Ideally it would wake the device up every 24 hours, run the program, then sleep for another 24 hours.

    Anyway, here’s the code:

    #include <Servo.h>             //Servo library
     
    Servo fish_opener;        //initialize a servo object for the connected servo  
                    
    int angle = 0;
    int times_to_run = 2;
    int start;
    
    void setup() 
    { 
      fish_opener.attach(9);      // attach the signal pin of servo to pin9 of arduino
    
    } 
    
    void loop() 
    { 
    
      while(start <= times_to_run)
       {
        
        for(angle = 0; angle <= 45; angle += 6)    // command to move from 0 degrees to 45 degrees / increment of 6
        {                                  
          fish_opener.write(angle);                 //command to rotate the servo to the specified angle
          delay(10);                       
        } 
       
        delay(500);
        
        for(angle = 45; angle >=1; angle-=6)     // command to move from 45 degrees to 0 degrees / increment of 6
        {                                
          fish_opener.write(angle);              //command to rotate the servo to the specified angle
          delay(10);                       
        } 
      
          delay(500);
          start += 1;
       }
    
      start = 0; //reset while loop variable
      
      delay(86400000); //24 hours
      
    }

    All in all it was a fun project. I really enjoy the hardware side of things and hadn’t put something together a little more than two years ago with my crypto miner.

    Cheeky Bonus

    When I decided I was going to make this into a blog post I airdropped all of my photos and videos from my iPhone to my MacBook pro.

    fffffuuuuuuuuuuuuuuuu

    HEIC isn’t a friendly web format and there was no way I was going to open up each file in preview and export them. A little known trick with these newer formats like HEIC and WEBP is you can simply rename the file extension to convert. However, there was also no way I was going to manually click each file and rename the extension so I used this handy 8 line Python script:

     import os,sys
     folder = '/Users/RFaile/Desktop/fishfeeder'
     for filename in os.listdir(folder):
            infilename = os.path.join(folder,filename)
            if not os.path.isfile(infilename): continue
            oldbase = os.path.splitext(filename)
            newname = infilename.replace('.HEIC', '.jpg')
            output = os.rename(infilename, newname)

    Which fixed it right up in less than a second:

    Programmers are so lazy.

  • One Rep Max Calc and SSL oh my!

    One Rep Max Calc and SSL oh my!

    Today I touched up https://strong.rudyfaile.com/ by adding SSL and forcing http redirects. I should have done this in the first place, seeing how easy SSL with Let’s Encrypt is but hey, it’s done now. I also put SSL on the other subdomain projects.

    I also added a one rep max calculator which lives at https://max.rudyfaile.com/ (and is linked in the 5/3/1 program generator, see below:)

    😄

    The purpose of the one rep max calculator is to help you find a 1 rep max if you aren’t looking to necessarily lift the absolute amount of weight that you absolutely can in a single rep. In a perfect world, you should always try.

    Let’s say however that you generate a four-week program and on week 3 you miss your lift for 1+ reps in the last set (set 3). It will be tough to calculate an accurate four week program without a number, and it’s never a good idea to guess. Instead, you could lift a lower weight (not too much lower) for as many reps as you can using the 1 rep max calculator. This will allow you to use a decently estimated number for the next program generator.

    In other news: https://strong.rudyfaile.com/ and https://game.rudyfaile.com/ have SSL now too. One cool thing about that is you can play Lucy’s Adventure offline as a result (assuming you’ve already loaded the game) 😄

  • strong.rudyfaile.com

    strong.rudyfaile.com

    I couldn’t sleep last night so I decided to whip up a 5/3/1 barbell training program generator in PHP for all to use freely 😄. Since finishing my 100 days of running I have more time available to me to both program and lift weights, and combining these two hobbies is one of my favorite things to do 💪🤓 💪.

    The program lives here: http://strong.rudyfaile.com/

    If you aren’t familiar with Jim Wendler’s 5/3/1 I highly recommend looking into it. Jim is a no-bs strength guru and I’ve found his program, as is its namesake, as the Simplest and Most Effective Training System to Increase Raw Strength. The beauty of the program is its built around you, and adjusts to your progress every four weeks. Essentially, you start out by testing your one rep maxes in the four core compound lifts: Overhead Press, Deadlift, Bench Press, and Squat. From there, the calculator generates a 4 week program based on your lifts. In week 1 you’re doing 5 reps across the board, week 2 three reps, and week 3 is your 5/3/1 week where you’re looking to max out. This is the most important week as the lifts here determine the following 4 weeks’ program. Thus, you have an ever-evolving, infinite duration strength training program custom tailored to your needs.

    This was the first time I’ve cracked my knuckles to square off with PHP in a long time but I was extremely pleased with how fast I was able to jump back into it and rapidly port my command line Python version of this program to a web-driven one.

    Mostly, I’m a terrible designer and I’m so pleased with how this came out on both the web and mobile 🙂 – especially considering this was developed bare-bones from the ground up.

    I did a decent job of sanitizing input and ensuring validation with functions like isset() – right now the only bug I’m aware of that I need to work out is the sizing on mobile but it’s tough to keep things readable in a table and still have it fit on the screen, still works though ¯\_(ツ)_/¯. I also chose to use $_GETmethods instead of _$POST so that folks could save the permalink if they wanted to revisit their program without re-entering the numbers (I added a nifty one-click button for this, too!)

    On top of enjoying PHP development for once I got deep in the woods in Apache’s virtual hosts to set Lucy’s Adventure and my 5/3/1 calculator as separate directories on the same web server which is pretty cool. I’m having fun tinkering with all this stuff and am excited to add more projects to the *.rudyfaile.com subdomains!

    If you have any questions about how to use the program or strength training theory in general feel free to leave a comment below 👇 or contact me privately. Also looking for feedback on what would make the program more intuitive (design suggestions are probably hopeless 😅.)

  • Lucy’s Adventure call for testing!

    Lucy’s Adventure call for testing!

    I made a recent post about my progress working on this game.

    If you’d like, you can play the work in progress 👉 here!

    Feedback/comments/suggestions welcome 😄

    I’m still working on the final art/sounds/music and adding more levels. I’ll have controller support in soon as well 🙂

  • Fortuitous A.I. Mechanics

    Fortuitous A.I. Mechanics

    Kristen is out of town today which means I have some free time to drill down and work on my little game side project. The working title is “Lucy’s Adventure” (Lucy being the fox). It’s a Super Meat Boy/Boshy inspired platformer that aims to be progressively difficult, but in a non-bullshit type of way. Translation: death happens a lot, but the game telegraphs to the player how. The goal is for the player to feel like every death could have been avoidable.

    After completing the game’s first two levels, aptly named “Baby Steps” and “Mechanics” I started work on level 3: the game’s first boss fight. In this fight, Lucy picks up an M16 which initiates a battle with the Boss of the first three stages: Lava Lord.

    Sometimes when programming, the funniest and/or most unexpected things can happen. In my case, this usually is from a result of lack of understanding, a mistake, or more often: laziness. These two images sum this up perfectly:

    For example, I didn’t want to redraw or edit sprites to have the gun move with Lucy, so the gun destroys itself and redraws every frame on Lucy’s position. It works great, and looks hilarious. Perfect.

    😂

    Even more funny was when I started programming the Boss’ A.I. It’s a pretty challenging process in itself, lots of function tail calls and recursion until certain conditions are met, signalling the boss to change states. I created some states to bring what I’ve considered abstractly to the game. When I ran my build, I just about lost it:

    Holy…

    The problem was obvious: I was calling the function that handled the Boss’ attack incorrectly. However, the outcome was better than if the game were working properly: it was harder to dodge, and actually looked pretty cool.

    LAME

    After I fixed it (he only throws a single fireball, which was the original intention) it felt… lame. Obviously the movement will be sped up, but a single fireball at this point seems unfulfilling.

    I wonder if I should change it back. If I do, I wonder if creating so many instances of the fireball object like that will run poorly in some browsers or devices. I wonder if I should find a way to make it look like that properly without devastating that poor Android device running KitKat.

    I wonder how many developers work on software and make mistakes that become features. It’s really a great feeling. I imagine it’s like painting a picture and spilling the paint bucket on the canvas. While you’re initially worried that you screwed up, on second look – that blotch kind of looks like something, let me add a few more colors. Wow, that mistake really made the piece!

    At a minimum, I definitely think I need more fireballs on this canvas 🔥.

  • MC-Impressions.com

    MC-Impressions.com

    MC Impressions is a family owned and operated screen printing and embroidery business proudly serving customers in Claremont, California and the surrounding areas.

    After developing a site for my good friend and expert hairstylist Rickey Windust, I was referred by Rickey to this small business to re-vamp their Business website.

    One of the owners, Christine, reached out to me and we got to work. MC Impressions was a dream client to work with! I highly recommend anyone looking for screen printing, embroidery, or promotional products in the Los Angeles, Riverside, or San Bernardino county area to reach out!

    The final product can be viewed here.

  • rickeywindust.com

    rickeywindust.com

    Browsing through Facebook, I saw that my long time friend Rickey was actively working to re-structure and re-energize her massively successful hair styling business.

    It looked like she had most of the pieces in place. She already had a solid business model, loyal customer base, and was actively creating content on social media sites like Facebook and Instagram.

    On a whim, I reached out to her to see if she’d like some help developing a professional portfolio site to showcase her skills. Being a savvy business owner, she had already realized that a website was the missing piece to her puzzle, and was delighted to enlist my help!

    We got to work shortly after. I initially developed a site using the Profile Theme Demo, but it seemed like Rickey was more intrigued with the WordPress platform itself! She ended up making a lot of changes (Even switching themes to our Twenty Seventeen Theme) all on her own!

    I had a lot of fun working on this site! Successfully teaching my friend and passing along WordPress to another person as an excellent way to manage a website was a great bonus!

    You can view the completed project here.

  • I built a crypto miner. You can too!

    I built a crypto miner. You can too!

    Table of Contents

    Background
    Purchase
    Initial Problems
    Success!
    Setting up your miner
    Conclusion
    Update


    Skip Background and get to installation

    Background

    Working through my master’s degree in technology, I began to notice a common theme. We pored over endless lit reviews which included futurists such as Ray Kurzweil and other like-minded fellows who spoke of an incredible concept just on the horizon of the Second Machine Age. This concept? De-Centralization.

    It didn’t really hit home until we began to see some data. Do you know which organization controls the most available hotel rooms at any given time in the world? It isn’t Marriot, it’s AirBnB. Any idea how many hotels AirBnB owns? I’ll give you a hint: you can’t divide by it mathematically. Let’s look at transportation: who do you think is providing the most passenger fares in the world? Oh, that little taxi company called Uber. How many taxis do they own? You guessed it.

    powerofzero.jpg

    I started to delve deeper into this de-centralization concept. Naturally, I stumbled across cryptocurrency, and suddenly, the dots connected. I’m no stranger to Cryptocurrencies, I have been following Bitcoin since 2010, and mined back when you could still do so on GPUs (those days are long gone and, sadly, I have no idea where that giant, old, 250gb externally powered hard drive is). I’m not going to act like I had a ton of coins like this poor fellow. I had a few, but that’s beside the point.

    Fast forward to 2017. Bitcoin is up to $12,700 USD at the time of this article, from a mere $758 exactly one year ago. I’ve been talking about Bitcoin for years, but it wasn’t until the currency surpassed $10,000 last month that people started reaching out to me.

    In what felt like overnight, I received messages in every medium. People that I haven’t spoken with in years, new friends and old the same. All wanted to know my insight on crypto:

    questions.png

    Yeah, even my mom at 5am

    I started to realize I knew more about crypto than I once thought. I read countless websites, and talked to a variety of people and thought: “what? I know more than this….” Ultimately, I decided to put my money where my mouth was.

    My initial goal was to get my hands on a few Antminer S9’s to mine Bitcoin. Unfortunately, they’re constantly out of stock due to an insane demand to the manufacturer, Bitmain, and as a result, the prices have been as high as $4,000+ for a single unit on sites like eBay and craigslist.

    antminers9.png

    Well, I knew I wasn’t going to pay a 37.5% markup on the retail price of $1,500… not to mention the additional power supply cost, so I returned to my roots. I mined crypto with a GPU before right? There had to be crypto out there that’s not on the SHA-256, still capable of being mined by GPU. Fortunately, there is. I chose to mine Ethereum due to its popularity, price, and smart contract focus. But remember, Peter, with high prices come high network hashrates.

    I’m lucky enough to live in Orange County, CA. Just a hop, skip, and jump away from a Micro Center. If you don’t know what Micro Center is, it’s great. Imagine Best Buy, Circuit City, and your favorite nerd passion had a baby. That baby is Micro Center.

    microcenter.jpg

    Purchase

    initialpurchasemicrocenter.jpg

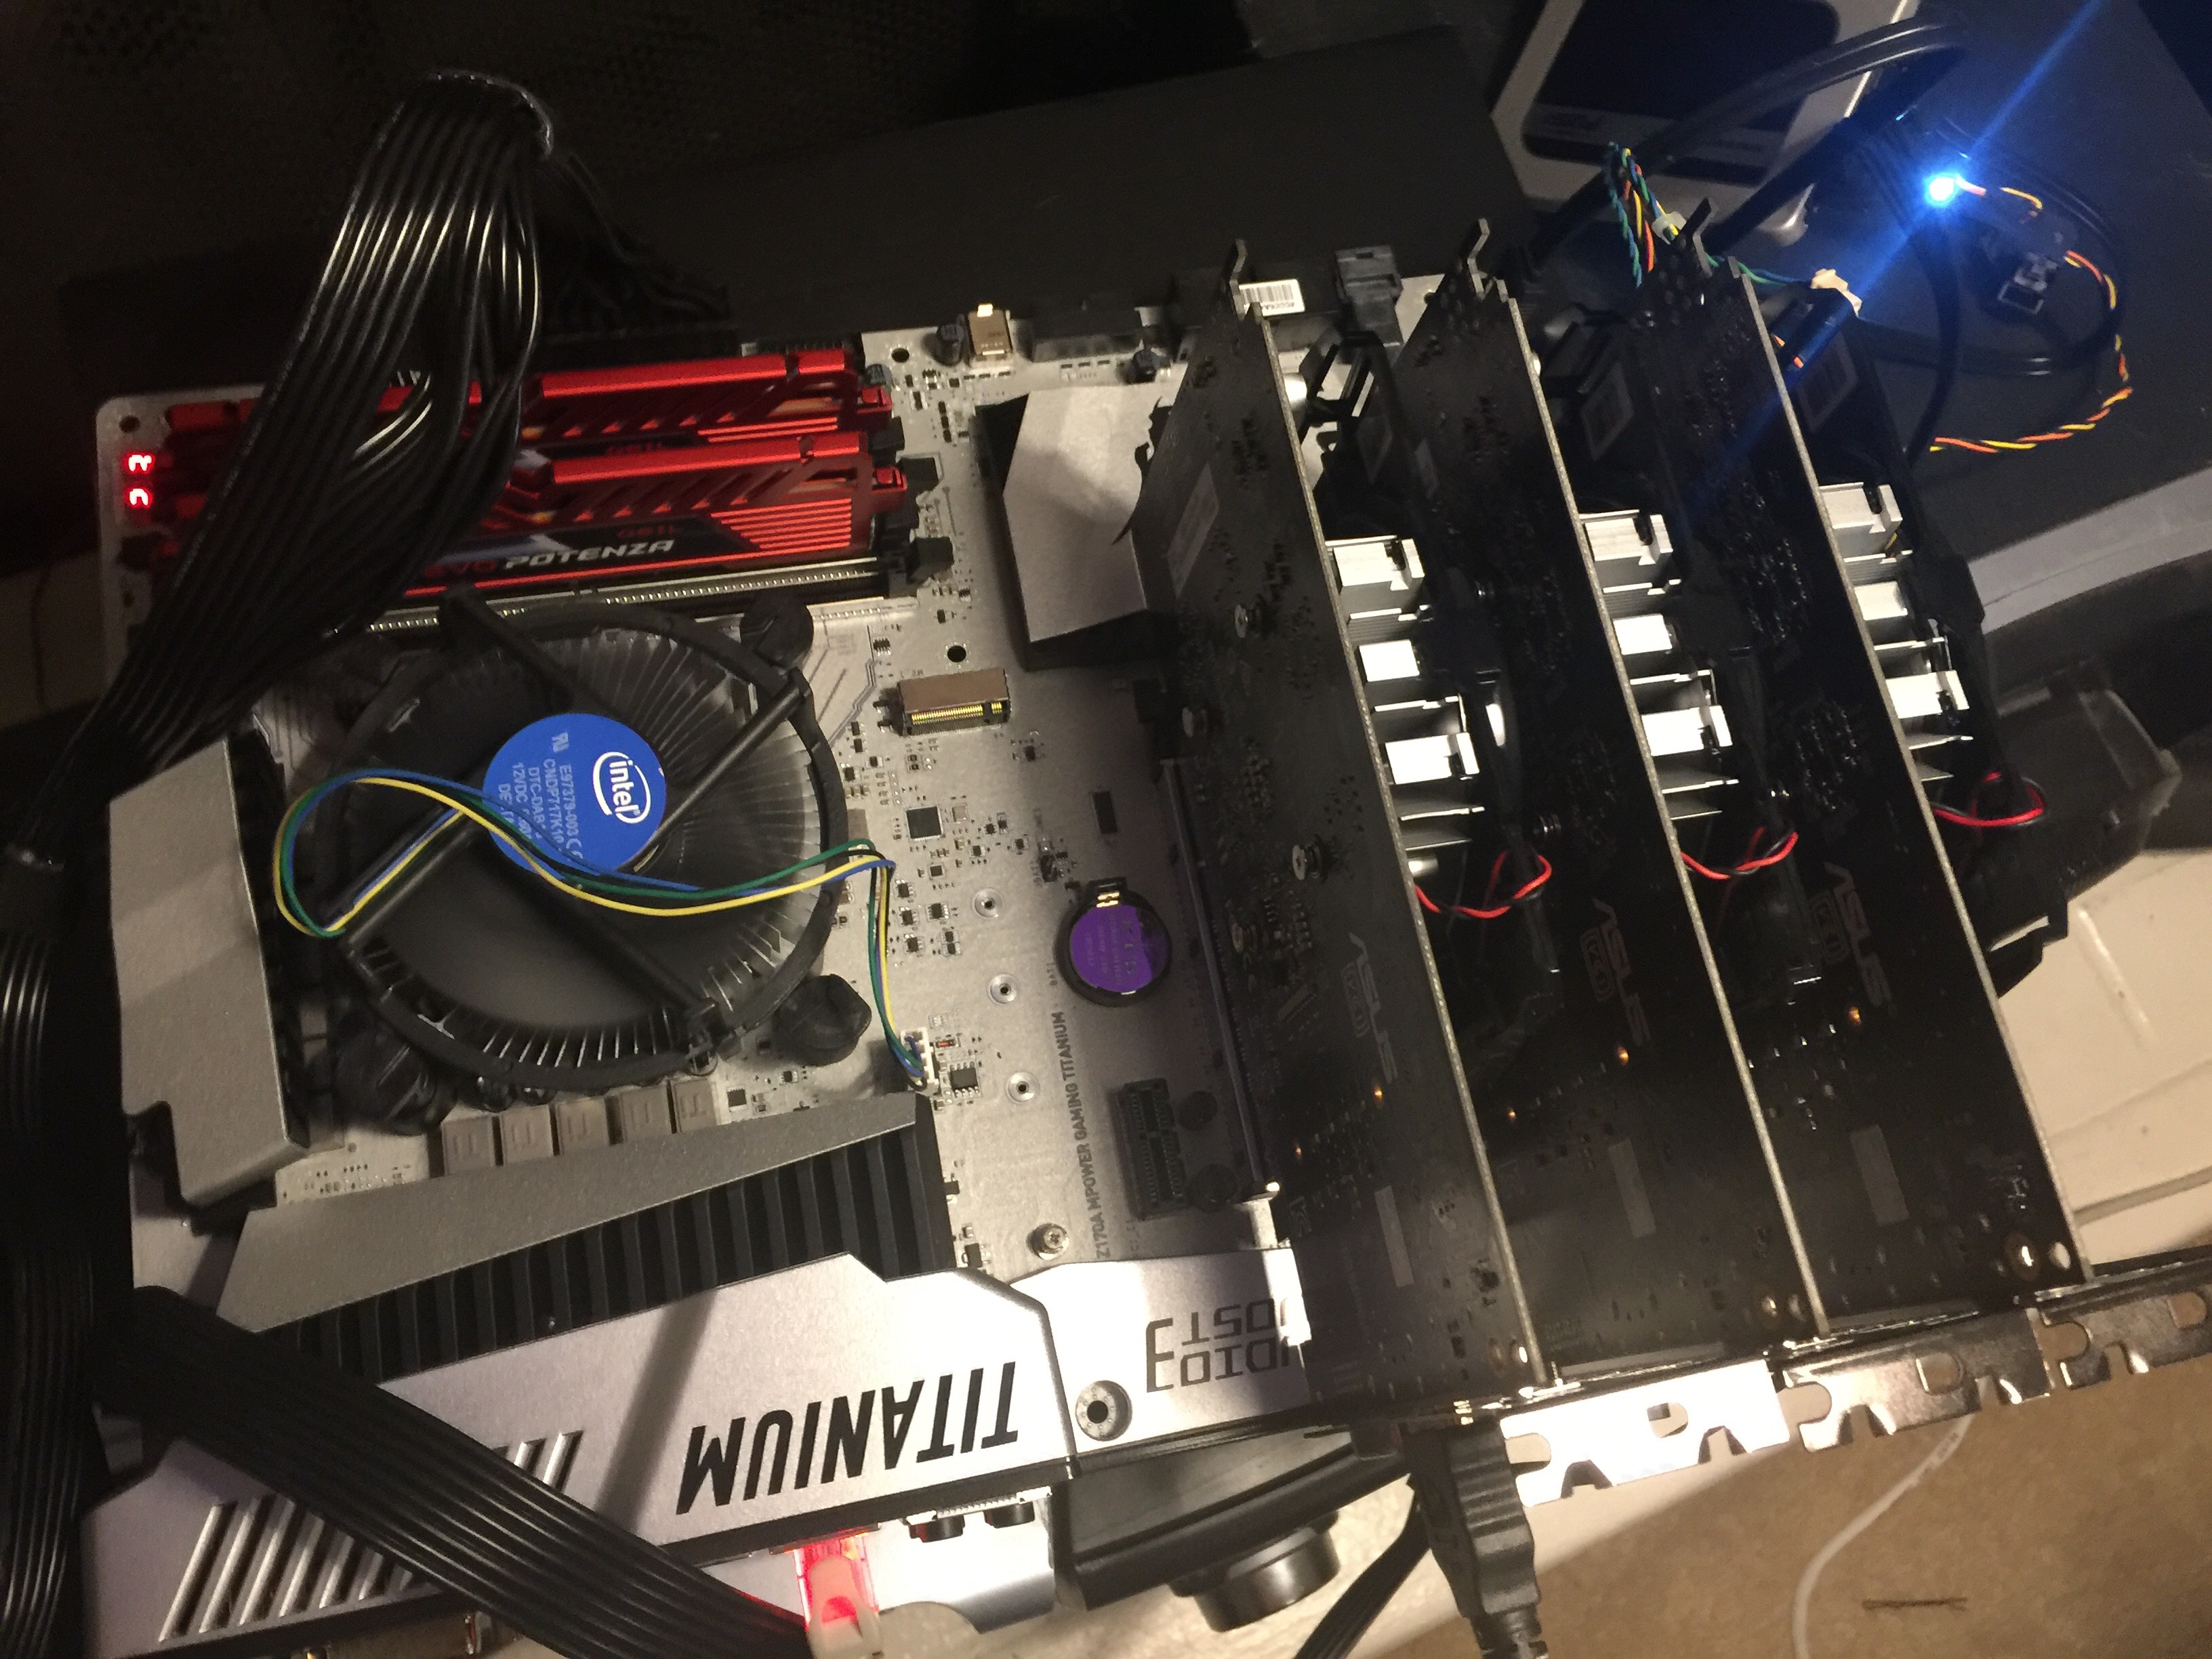
    $1,034 later. I had a lot of computer hardware

    My Miner Specifications

    Component Name
    Motherboard: MSI Z170a Titanium Edition
    Processor: Intel I3-7100 3m Cache, 3.90GHz
    Storage: Crucial 275GB MX300 2.5 SATA SSD
    RAM: GeIL EVO POTENZA 8GB (2 x 4GB) 288-Pin DDR4
    GPU: ASUS Radeon RX 550 (x1)
    GPU: ASUS Radeon RX 550 (x2)
    GPU: ASUS Radeon RX 550 (x3)
    PSU: Thermaltake Toughpower Grand 1200W

    I skimped a bit on eveything. Mining doesn’t require a lot of processing power (at least from the CPU), or RAM for that matter… the bulk of the processing power stems from the GPU. I elected for a simple i3 and 8gb of DDR4 RAM (DDR4 Required by Motherboard). The places I splurged a bit include the motherboard, PSU, and 3x GPUs. When I say a bit, I really mean a bit… this could have been much worse.

    Initial Problems

    I took everything home, promptly threw away every manual and box (WARNING: I DO NOT RECOMMEND THIS) and started connecting things. Although I knew everything was connected properly, I couldn’t get the BIOS to show up on output.picofinitialsetup.jpg

    This wasn’t good. After consulting the motherboard error codes, manual, and every computer forum known to man (shoutout to Tom’s Hardware), I realized my mistake.

    I purchased a 7th Gen processor and a 6th generation motherboard. This was a serious problem because to flash the BIOS you need a 6th generation processor. I didn’t have one. It’s even more unfortunate because 7th generation boards come with a simple FLASHBACK+ mode where you can simply input a USB without display and flash the BIOS….again, I didn’t have that.

    Micro Center to the Rescue!

    Knowing the problem, I took my board back to Micro Center and explained the BIOS upgrade issue. The guy at service repair was super cool and knew exactly what I was talking about. Micro Center flashed the board in less than an hour for $30, which I was happy to pay because it was my mistake and I didn’t want to purchase another processor.

    Success!

    After flashing the BIOS, everything worked famously. I reconnected everything including the 3 GPUs. I created a bootable Linux USB using Win32 Disk Imager in the flavor of Ubuntu 16.04.3.

    From here, it was all gravy. I reconnected the motherboard to the Processor, RAM, PSU, SSD, and inserted the Bootable USB.success.jpg

    The most important thing, I think, in this whole process was naming convention. At the request of my good buddy and fellow grad student Travis, I named my new rig “CRACKBABY”.

    Once I got my crack baby all named and setup, to the command line I went!

    amdgpupro.jpg

    The most important steps here were getting Ubuntu to recognize the GPUs, and installing the mining equipment. Here are the steps:

    1. The first thing you need to do is install the dependency.
    2. $ sudo apt install software-properties-common

    3. Then, you can enable the repository and update apt.
    4. $ sudo add-apt-repository -y ppa:ethereum/ethereum
      $ sudo apt update

    5. Now, install the packages
    6. $ sudo apt install ethereum ethminer

    7. Next, you’re going to need a wallet to store the currency. I chose Mist.
      You need to install the dependencies if you’re going to use this option.
    8. $ sudo apt install libappindicator1 libindicator7

    9. With the dependencies installed, you can grab the latest release of Mist
      from the project’s Github page. You’re looking for the “Ethereum Wallet” package.
    10. Install the package with dpkg.
    11. $ sudo dpkg -i Ethereum-Wallet-linux64-0-9-0.deb

    12. Open up Mist and go through the setup. Save your private key
      and NEVER give it out.
    13. Your public key is how others send you money, and how you’ll get paid.

    14. Leave the application open to sync with the Ethereum network.
      It will take a long time and considerable hard drive space to synchronize everything.
    15. I recommend joining a pool to be profitable. Solo mining is hard.
      Joining a pool is easy, they have instructions on their page on how to connect.
      I chose Ethermine.
    16. Once the wallet syncs, and you’ve chosen a pool, it’s time to connect.
    17. $ ethminer -G -F your.poolurl.com:port/0xYOURWALLET.COMPUTER NAME --farm-recheck 200

    18. Replace your.poolurl.com:port with the pool you specified, those
      addresses will be specific to that pool and can be found on your chosen pool’s site.
      Replace 0xYOURWALLET with your public key, .COMPUTERNAME is up to
      you if you’d like to name your worker. –farm-recheck 200 is how often to check for jobs.

    That’s it!

    You can check the status of your worker using your pool’s website. On Ethermine they have an easy to access search function where you can plug your worker in.

    It was a really fun, albiet sometimes frustrating project. The hardest part of this whole process will be getting linux and ethminer to talk to your GPU. There are separate drivers and dependencies whether you buy a Nvidia or Radeon card, and it’s a PROCESS to set them up. I ended up ultimately returning the three RX550s for a pair of GTX 1070s. The hashrate of all three RX550s was less than a single 1070.

    doublegtx1070.jpg

    Using the settings I specified in this article I’m hashing at about 29 MH/s per 1070…

    crackbaby

    If this guide was helpful for you, you can tip me at ethereum: 0x92b2b7fb42c26b9469554db93be293ba263cfc88 or simply run the ethminer using my wallet address for a day or two (copy/paste):

    ethminer -G -F http://us2.ethermine.org:4444/0x92b2b7fb42c26b9469554db93be293ba263cfc88 --farm-recheck 200

    Update

    Eventually I expanded my operation to multiple rigs running 6x GTX 1070s each. I ran these miners successfully for about six months, then decided it was no longer cost effective after moving to a new state and paying a different rate for electricity.

    More questions? Feel free to contact me.

    Return to Table of Contents

  • Navy PMK Flashcards

    Navy PMK Flashcards

    I Developed and shipped an education App for Android and iOS designed to help Sailors study for the semi-annual advancement exam. “Navy PMK” Received 11,672 downloads its first month in the Apple Store, effectively reaching 24% of all active duty Sailors eligible for the September 2017 exam!

    You can check it out on Android and iOS here:

  • Hide it Hillary!

    Hide it Hillary!

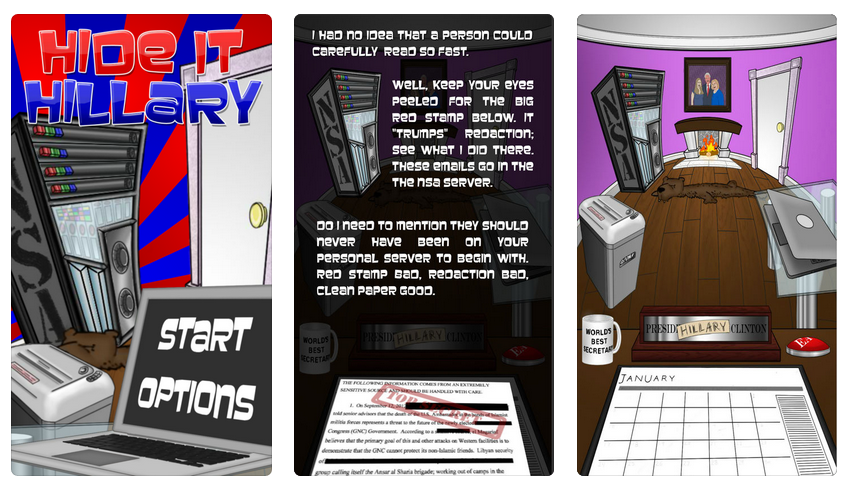
    Hide it Hillary! is a satirical game I created during the 2016 election. It currently holds a 5-star rating in both the Android and iOS markets with over 20,000 downloads.

    You can check it out here: iOS, Android.